Showing posts with label Urban Decay primer potion. Show all posts

Wednesday, September 26, 2012

Im back!! With a fall look!

So, I haven't had a working laptop for quite some time. But I' m excited to be back! I have lots of good products to review, and I'm always looking for more to try out. But my first post back is going to be a bronzy/fall look. I hope you all enjoy and start coming back regularly again!

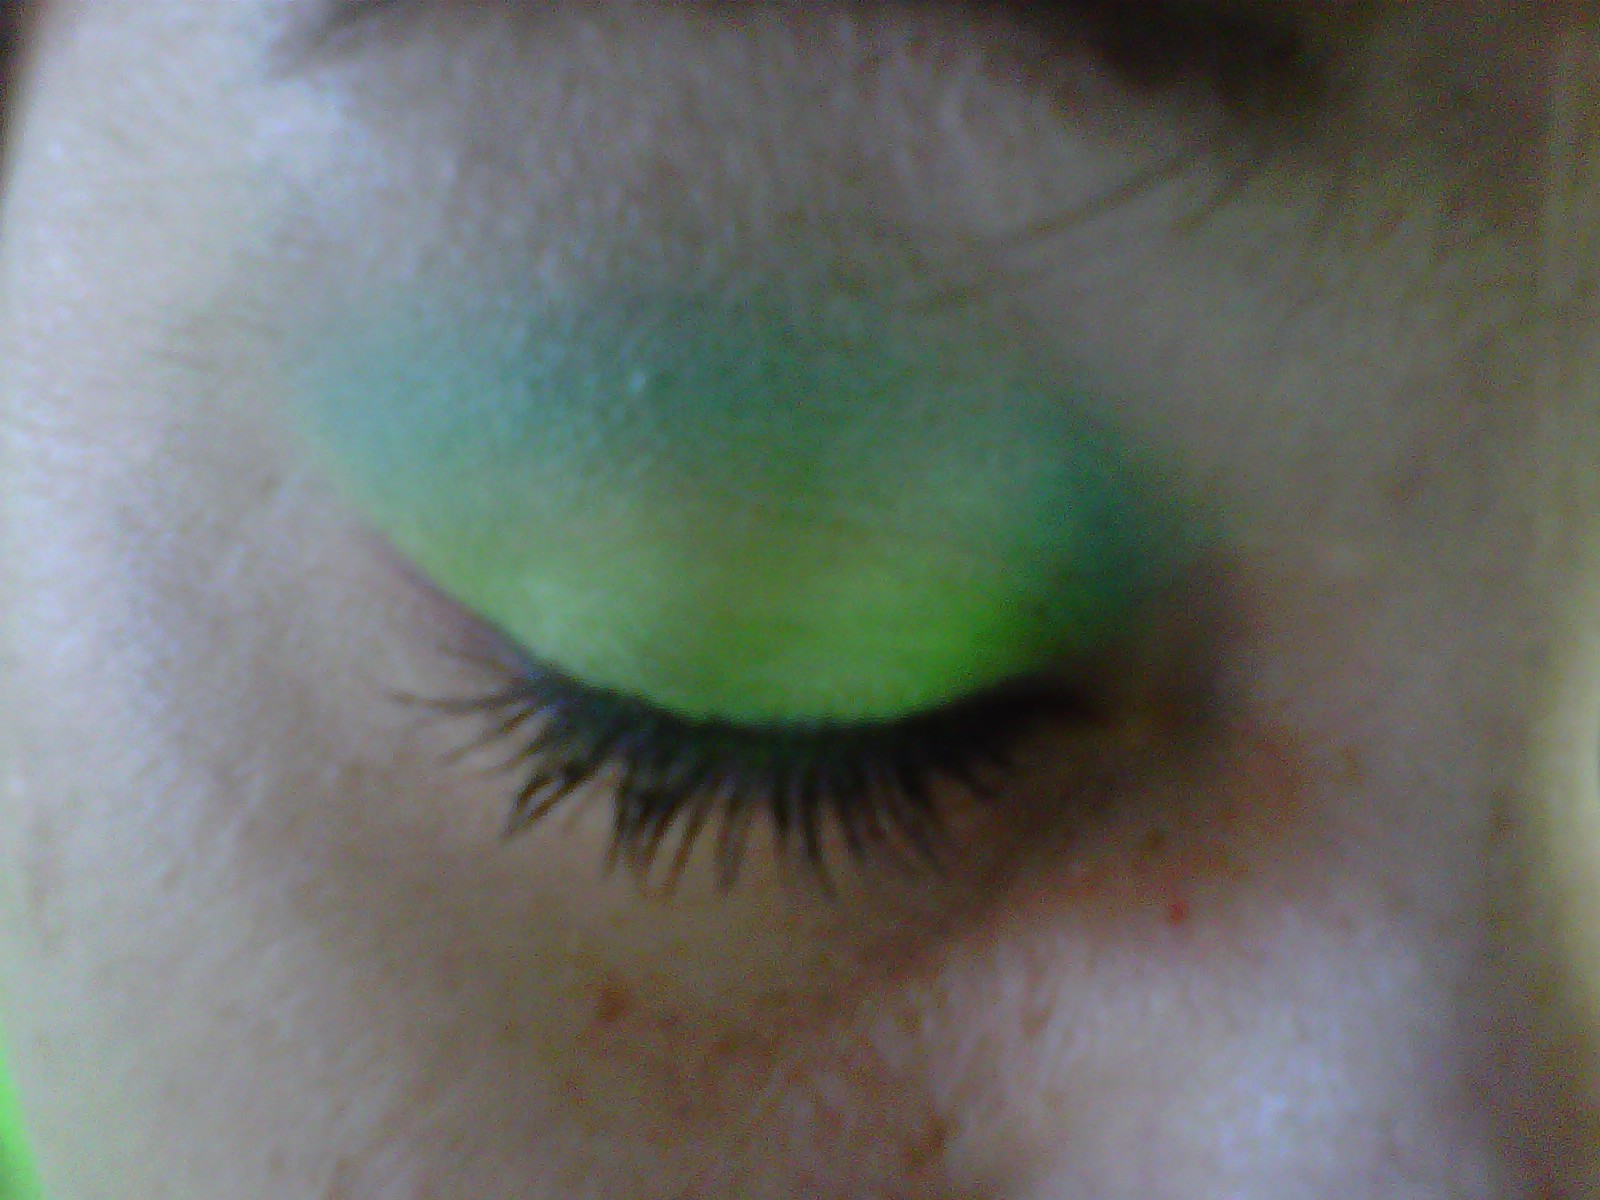
I started off this look with Urban Decay's Primer Potion, all over the lids and up into my brows - I've noticed this helps my brow pencil and powder to stay on better. So I my first shadows were a mix between chopper and half baked from the Naked 2 palette- I packed this mix onto the lid. I then took a mix of busted and tease into the crease and blending slightly up, and then to darken the outer V I took a tiny amount of blackout - also from the Naked 2 palette and worked it carefully in--it can easily get out of hand, so use a light touch! I highlighted with foxy from the Naked 2 palette which is a matte cream color..you don't want ALL shimmer on the eyes at the same time--and most of those previous shadows were shimmer. I filled in my brows with a pencil, then set it with a powder using an angled liner brush for precise application. I took a black liquid liner and lined my upper lash line and took it out and created a nice wing. I finished off the eyes with a curling mascara.

I moved on to the face and used a primer to start out--always use a good base--it will help the rest of your makeup go on really nice and last much longer. So after I applied my primer I would apply my foundation with a stippling brush-buffing it into the skin. Then concealed my blemishes and under my eyes (damn those dark circles!) with my concealor. I lay it down with a brush first, then pat it in to the skin...using your hands will warm up the product more and allow it to blend easier (some days I even skip the brush all together). I set everything with my Mac studio fix foundation and a big fluffy brush. I followed that up with my blush on the apples of the cheeks and a quick bit of lipstick. The following are pictures of the final look and followed by a list of all the products used. Thanks for checking back in and I look forward to continuing this blog!


Products used:

Products Used:

EYES

Urban Decay Primer Potion (original formula)

Urban Decay Naked 2 palette (all shadows)

L'oreal Lineur Intense in Carbon Black #H200 (upper lash line)

Urban Decay's SuperCurl mascara

Brows- Wet n wild Pencil in-taupe    And I used the wet n wild eyeshadow palette Vanity, I used the medium matte brown shade to set the pencil

FACE

Primer: Loreal- Studio Secrets face primer

Foundation: Urban Decay's Naked Skin foundation in 3.5

Blush: wet n wild's in Heather Silk

Conealor: Mac's Studio Fix concealor in NW20


Powder: Mac's Studio Fix Plus Powder Foundation in NW20

LIPS

Mac's Prolongwear Lipcreme in Unlimited 

Brushes Used:


Real Techniques Stippling blush to apply foundation

Urban Decay's double ended brush (comes in Naked 2 palette)

Elf blending brush (essential line) to blend all the colors seamlessly together.

Elf face brush (essential line) to apply face bowder

Elf blush brush (studio line) to apply blush and contour with elfs bronzer

Elf eyeshadow brush (essential line) for concealor

Revlon angle liner brush for brows

Friday, October 21, 2011

Pink Panther goes to Hollywood!

I've been toying with the idea of creating and naming a look like this. I love pinks and purples (especially together), and I was watching something the other day and the pink panther song came on. So I decided to dig through my stuff and come with a look and name it after the pink panther. I threw in some sparkles and a bit of purple to glam it up a bit. The sparkles represent the jewels he's always lookin for, and the purple is because sometimes in the drawings his outline looks a bit purpleish. Hence I came up with the name *Pink Panther goes to Hollywood*! Let me know what you guys think and I hope you enjoy!


*See this link for code for the 120 palette
I started off with my Urban Decay Primer Potion (as usual). I started off this look by applying Urban Decay's cream shadow in Sphynx on my lid . Sphynx is a light baby pink with loads of sparkle and shimmer. I applied 3 layers (allowing it to dry between each layer) to build up to a nice opaque pink shimmer color. I then took the color I2 (a matte bright pink) from my 120 pallete and applied it to my a crease and blended up. I then took the color I-1 (a darker shimmery pink) and applied it to my deep crease without blending up much. I wanted the matte brighter pink to still be seen quite a bit above the deep crease. I then took a mix of J6 and J10 (2 beautiful purples) and created a really high cut crease, I then brought it around to meet the outer corner of my eye. I  carried this color all the way around to meet my inner corner as well. Basically creating an outline of the entire pink parts of the eye. I then continue with the same colors and smudged them into my lower lash line and connected the purple on the bottom with the purples on the top. I did not want to blend any of the purple into the pink much because I wanted a stark cut between colors. I then added L7 (a creamy white) as a highlight under my brow. I then took my gel liner and lined my upper lash line only, winging it out just a tiny bit. Lastly, curled my lashes, added mascara and filled in my brows.

I moved on to my face and applied my elf primer using my hands and then my foundation as well. I then applied my blush and my finishing powder. To complete my look I applied my lipstick and gloss.

Products used:

EYES

Urban Decay Primer Potion (original formula)

Urban Decay's Cream Shadow in Sphynx

120 eye palette (1st edition) for all eyeshadows (unless otherwise mentioned)

Maybelline Gel liner: black (upper lash line)

NYC Skyrise lengthening Mascara in Extreme Black #842

FACE

ELF Face Primer

Foundation: Revlon ColorStay in 150 Buff

Sally Blush (sold at Sally's Beauty Supply)

NYC Transluscent finishing powder

LIPS

Avon's Ultra Color Rich Lisptick in Wink Pink

L.A. Colors Ligloss in Pink Pearl

Brushes Used:

Elf essential eyeshadow brush to pack color on everywhere and do light blending

Revlon's Smokey eye Brush (for angled liner side and smudge side)

Elf blush brush (studio line) to apply blush and contour with elfs bronzer

Elf concealer brush (essential line) to fill in my eyebrows


Friday, October 7, 2011

grape madness!

This look was inspired by xsparkage's video on youtube. I absolutely loved the look and did my own spin on it. And I love the way it turned out. It reminded me on neon green and purple grapes! So I recreated it this morning before work and got a ton of compliments on it! These pics were taken AFTER work, I was sitting in the car waiting for my mom to get out of a store. So keep in mind I was pretty tired in these pics, and the make up wasn't freshly applied (was applied around 9 a.m. and these pics were taken around 4:30 p.m.). But here ya go:


Here is the link to 120 palette code: 

I started of using Urban Decay's Primer Potion all over the lid and under the eye. I then started off applying colors D6 and C9 (a mix) to give it a bright color with just a tiny bit of shine. I packed that on the lid to get the brightness I wanted and made sure it was applied evenly. I then moved on to number F4 which is a bright blue and applied it to the crease, making sure to blend it slightly into the green so I don't have a harsh line. Above that I took L7 and used it as a highlight under the brow bone.I then lined my upper lash line with a pen style liquid liner then on the bottom waterline I used a black gel liner. On the lower lash line I used a bright purple, number J2, I used this wet to create an intense purple liner look. To finish off the eye look I applied mascara and filled in my brows with a matte brown eyeshadow.

To do my face, I started off with my Hard Candy face primer, followed by my Revlon Colorstay foundation. I applied both using my hands. After that I applied blush to the apples of my cheeks swept up towards my temple. I applied I tiny bit of concealer under my eyes and blended with my fingers. To finish off my face I applied my setting powder. It comes with this akward sponge on top, so I just dab it on my face then blend out with a fluffy face brush. And finally I added Elf's lip stain in Fashionista (without the gloss side) and Avon's lipstick in a twinkle pink.

Products Used:

EYES

Urban Decay Primer Potion (original formula)

120 Eye palette (1st Edition)

L'oreal Lineur Intense in Carbon Black #H200 (upper lash line)

Maybelline Gel liner: black (waterline)

Urban Decay's SuperCURL mascara

NYX Champagne and Caviar: darkest matte brown to do my eyebrows

FACE

Hard Candy Face Primer

Foundation: Revlon ColorStay in 150 Buff

Blush: elf's blush and bronzer duo

NYC liquid Concealer in light

Urban Decay's Razor Sharp Ultra-Definition Finishing Powder

LIPS

Elf's Lipstain in Fashionista (without the gloss)

Avon's Ultra Color Rich Lisptick in Twinkle Pink

Brushes Used:
Elf essential eyeshadow brush to pack color on everywhere and do light blending

Elf eyeshadow brush (studiol line) brush for the highlight

Elf blending brush (essential line) to blend all the colors seamlessly together.

Elf blush brush (studio line) to apply blush and contour with elfs bronzer

Elf Concealer Brush (essential line) to apply purple liner to lower lash line

Elf concealer brush (essential line) to fill in my eyebrows

Saturday, September 3, 2011

pink limeade smoothie tutorial!


I have another new look for you all today. It's called Pink Limeade Smoothie. I did the entire look using the Physician's Formula Shimmer collection for "green eyes", that I reviewed in my last post. I got a lot of compliments on this look. Even one from my boss at work, she said, " I didn't notice before, but your eyeshadow looks nice! It really brings out the color of your eyes!". One of my customer's said, "Not too many people can pull of those colors, it looks amazing on you!" So I'm quite happy with the look and I hope you guys give it a try!  Also I want to add, I did this make up look at 9 this morning, and I didn't take these pictures til around 6 p.m. So with Urban Decay's primer potion underneath, these shadows last amazingly well, and it was 92 degrees here today!